Wednesday, February 27, 2013

Wargaming Planet of the Apes

It's a well known fact I am a sucker for the quirky, so how could I resist the latest release from Crooked Dice Miniatures - Simian Minions. I had my eye on the Eureka offering from several years ago for their Planet of the Apes range but missed the chance before they withdrew the line.


Many postings ago I posed the question about what drives gamers to buy figures? these definitely fall into the category of nice castings and 1970's TV memories, perhaps a fun club game using Two Hour Wargames Rules, my fellow Wyvern Gamer Paul has an excellent collection of Cavemen, which could make for a useful "Man" hunt... see this blog Move along now nothing to see here

"Take your stinking paws off me, you damned dirty ape!"


With separate heads available including a rather fetching officer head, very much like Urko, the Chief of Security in the TV series. I can see a few more be added to the collection with a few head swaps especially with Salute fast approaching...


Just a minor distraction from the other planned projects, lets hope the guy's over at Crooked Dice sell enough so they make some Minions on Horseback.....

Sunday, February 24, 2013

Wyvern Wargamers - SAGA Day 23rd February.

Saturday saw the second Wyvern Wargamers - SAGA Tournament, 30 gamers locked in battle for the honour of being crowned Wyvern Warlord.


We expanded this years competition to 6 point Warbands, the day was won by Jon from our very own club with a whopping 131 points spread across 4 separate scenario's....
It made my 56 points look very average.
Congratulations Jon.

I really must learn how to play the board.....

A great days gaming and great to meet up with some familiar faces.

Thursday, February 21, 2013

Rules of Engagement (ROE) AAR - US Marines vs Japanese Part 2

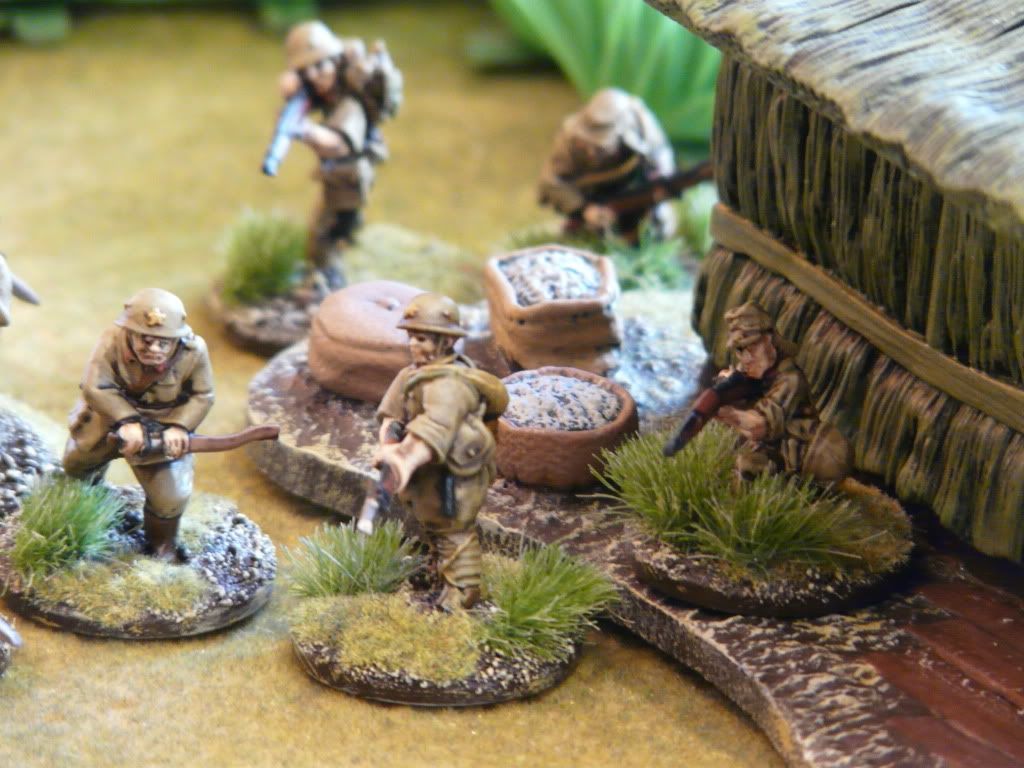
Deploying on hidden counters the Marines dig in and await the advancing Japanese, they must hold the temple and the village if they are to win the day.


The table - The main track can be seen in the centre of the table the Japanese can advance on the table width but the Tanks must travel on this central path.  The temple can be seen top right.


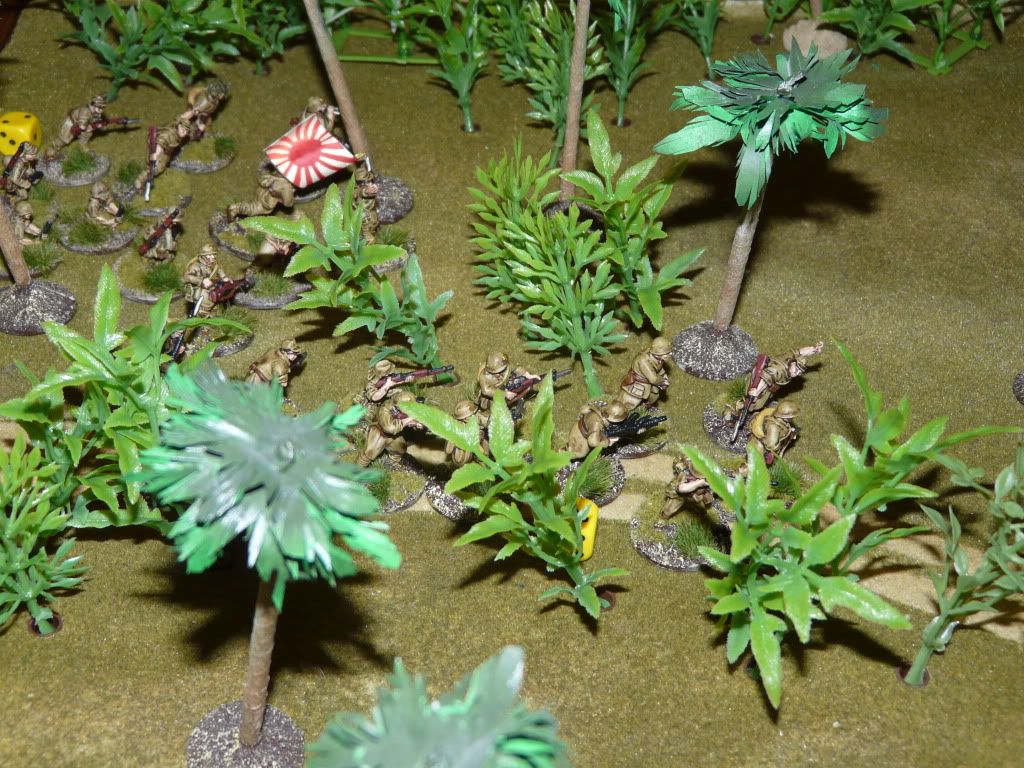
Turn One - The Japanese advance on to the table, Infantry sections on the right and left flanks, the main thrust and the armour pushing up the centre of the table.


The main Japanese attack, 2 Sections, 2 Light Tanks plus HQ and support.


Turn Three - The Japanese Infantry break cover and push into the main clearing unsure of the true location of the Americans.


On the left flank a Japanese Infantry Section and supporting knee mortars break into the village, still no Americans break cover.


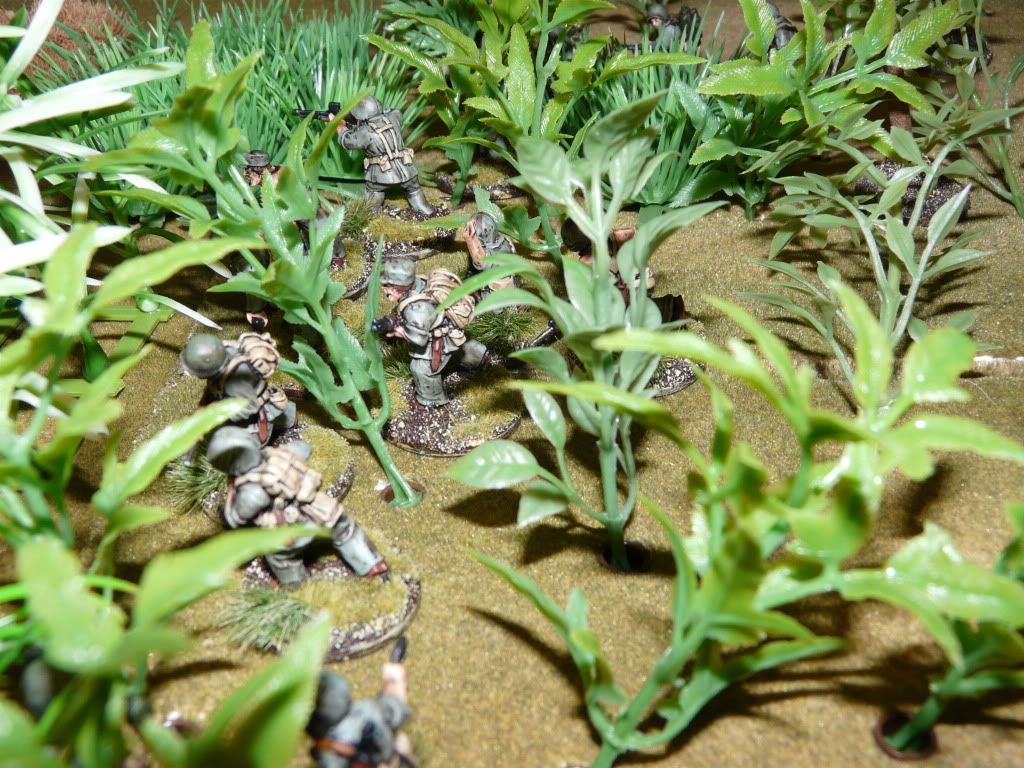
The Marines open up on the advancing Japanese heading up the central trail killing two troops and forcing one of the first Japanese sections in to cover.


The tanks advance pouring fire in to the marines but fail to inflict any casualties.


On the left flank the Marines open up on the Japanese, halting them in their tracks.


In the centre more Marines break cover and pour fire into the advancing Japanese.


The Japanese suffer 6 casualties an are forced to head back into the undergrowth to re-group, however this exposes the US to the full Japanese main force.


On the right flank, a Japanese flanking force is ambushed by the US defenders.


The resulting fire fight allows a Japanese section to flank the Marines and turning the ambush on the ambushers.


It never plays to be caught in  the open under the Rules of Engagement rules, 3/4 of the Marine section are killed.


Meanwhile on the left flank the Japanese continue their push into the village the knee mortars forcing the Marines into cover.


In the centre track the Japanese armour advances up the track in an attempt to break the US strangle hold on the jungle path, the Japanese right flanking force breaks cover and catches the US Marines in the flank.


US casualties start to mount in the centre.


The US Marines fall back into the village.


 On the right the flank the US counter attack and engage in close combat wiping the Japs out, Uncle Sam will be proud.


A Marine bazooka team rises from the log pile and takes a well aimed shot destroying the lead Japanese armour.

The evening draws to a close, casualties have been even with both sides losing around 17 figures each, but the Japanese had failed to break through the central trail and whilst making progress on the left flank in the village, there were sufficient Marines in the village and around the temple to call this a US victory. 

Tuesday, February 19, 2013

Rules of Engagement (ROE) AAR - US Marines vs Japanese Part 1

Sunday night saw Wyvern Wargamers refight a small part of an engagement from the Japanese Guadalcanal campaign with the Kuma Battalion attacking a swamp filled patch of Jungle prior to the assault on "Edson's Ridge" (Lunga Ridge).

The search for the perfect WW2 rules continues and tonight we used Rules of Engagement and selected the "Hold the Line" scenario. Mark volunteered to run the game and provided me with the OOB for both sides so I could make up the forces before hand.

Photobucket
Mission Brief 
Attacker:Japanese Kuma Battalion

You are ordered to launch an assault on a key section of the enemy line as part of a wider attack in an effort to punch through and cut off the enemy force.
US forces are thought to be holding the local village together with a spotter in the nearby temple.

Defender: US Marines

As the enemy presses home the advantage, you are ordered to hold your position in an effort to keep possession of vital supply lines and the temple which your Artie spotter has been using to interdict Japanese movements. 

Order of Battle 
Attacker: Combat Effectiveness 25          Defender: Combat Effectiveness 18

I altered the scenario weight slightly with 23 points for the Japanese and 16 for the Marines as the unit composition in ROE was slightly different as I had originally built my forces, however it could be argued that casaulties have taken their toll on both sides.

The Battlefield 
One piece of terrain is chosen by the defender as their HQ in this case the temple – this is the primary objective. It may be a building or another suitable piece of terrain. Placed at least 20cm and no more than 40cm from the defenders table edge and no closer than 50cm from either side. 

Deployment 
Attacker deploys all their troops following the deployment of the defender’s hidden markers. Start 30cm in.
Defender deploys first using the Hidden Deployment rules. All markers must be within 40cm of the objective.
Attacker goes first. 

Victory Conditions
Demoralised troops do not count.
Attacker Decisive Victory:
Attacker has twice as many figures than the defender within 20cm of the objective.
Attacker Marginal Victory:
Attacker has more models than the defender within 20cm of the objective.
Defender Marginal Victory:
As per Attacker, but Vice versa.
Defender Decisive Victory:
As per Attacker, but vice versa
Any other result is a draw.

With 23 Points to spend on the Japanese attackers I opted for the following forces.

Photobucket
Platoon Command
3 Rifle Sections
3 LMG teams
1 Grenade Launcher Section
1 HMG team

2 Type 95 Tanks

More than enough to push the Marines from the jungle path and village.

The Marines before them had 16 points to spend, these were spend on the following elements.

Photobucket
Platoon Command
2 Rifle Squads
.30 Cal MMG Team

Bazooka Team

Enough to hold the board for the night?

Parrt 2 AAR Tomorrow.

Sunday, February 17, 2013

Ambush Alley - Sierra Leone 2000

Its been 12 months since the last outing for Sergeant Strickland and his fellow Marines as part of Operation Palliser and the British operation to bring the rule of Law back to Sierra Leone.

Saturday night saw a detachment of Marine's deep in to the Occra hills assigned to protect a compound housing several nuns, the sick and elderly who have been put at risk from the advancing rebel forces of the Revolutionary United Front.

The orders are simple hold for 8 turns..... which will allow for the mist to lift and the choppers to come in and relieve the little garrison.


 The table with Compound in the centre of the village.


The British first section on over watch on the compound roof.


The British Second Section man the outer wall.


The RUF enter the table on all sides, but are pinned by the concentration of fire from the Marine detachments with a number of the groups being destroyed on sight.


Turn 6 a lucky strike from an RPG puts two of the Marines out of action and forces the other two members of the fire team to seek cover within the main building as the rebels make their move.


Turn 7 Rebel fighters reach the foot of the building and but are beaten back by the two Marines firing from the windows.


Turn 8 concentrated fire from the RUF force the Marines from the window and the rebels break into the compound however the clock ticks down to zero and the Marines survive. 

As with many a game we both agreed that 2 further turns would have altered the outcome. Still a fun game completed in under 2 hours.

Saturday, February 16, 2013

Yet more Fish Tank Terrain.....


Another trip to the pet shop and another bargain.. this piece is a little more niche but after seeing this photo of Napoleon in Egypt, how could I resist.


I picked 2 for £12 and whilst I can't see them gracing the wargames table that often it will give me an excuse to paint the Savants from Brigade Miniatures that have been sitting on the paint table for months.

French on Patrol in Egypt.....


Goats lead the advance guard for the Ottoman command.

Wednesday, February 13, 2013

Crescent Root Studios 28mm Middle Eastern Buildings Review

My latest order from Crescent Root Studios arrived after having a rather lengthly stay with HM Customs and Parcel Force. I ask you £12.00 import duty and £8.00 handling fee - daylight robbery I tell you.....
Still it was worth the wait.


I originally ordered from Mark at least 7 years ago and have my eye on the extra in fill pieces for his compound together with Dome to give me options for my Egypt project.
The extra pieces were not cheap, but the quality is excellent and the new Dome roof really sets off the rest of the terrain.


28K1 (dome/tower pieces):   $15.00
28M1:                                    $40.00
28N1:                                     $16.25
I am always a little mindful of ordering resin from aboard you never know how well it will fair in shipping, but the buildings were exceedingly well packed, with all buildings, doors and roofs all shrink wrapped and surrounded by packing paper.

Now the great thing about Crescent Root is how functional and playable the buildings are, each building comes with removable roofs and doors which slot into the door frame allowing you to remove them for certain scenarios.


The doors themselves slide in to place which makes them study and stay in place during game play.


The door frames are large enough to allow a figures based on a 2p to walk through and the walls high enough to position firing figures behind.

My original collection has had several years of gaming play and has not suffered from any chips or flacking like some alternative models available on the market.


This close-up above shows the texturing of the walls showing exposed brickwork and cracked plaster.

I can't speak highly enough of Crescent Root buildings, I have used them for Africa, the Middle East, Pulp games through to Star Wars.
Just need to pull together a scenario now....